DIY Montessori Continent Box for Home Geography Learning
In our bustling Indian homes, where often space is a premium and family time is cherished, finding engaging ways to introduce the world to our little ones is a delightful challenge. Imagine bringing the entire planet into your living room, scaled down and ready for tiny hands to explore! Today, we're diving into how you can create a simple, effective DIY Montessori continent box for hands-on geography learning right at home.
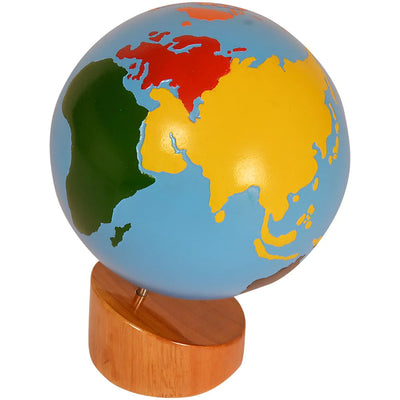
A Montessori continent box is a tactile, engaging way for young children to learn about the world's continents. It typically consists of a box (or a series of trays) where each compartment represents a continent, often coloured according to traditional Montessori geography colours. This works because children aged 0-6 learn best through sensorial experiences and concrete materials, rather than abstract maps. Parents can use this box to introduce continent shapes, names, and even the unique cultures and animals associated with each region.
Bringing the World Home: Why Geography Matters Early
From watching colourful nature documentaries with their grandparents to hearing stories about distant lands, children are naturally curious about the world beyond their immediate surroundings. Introducing geography early, in a fun and interactive way, fosters this curiosity and lays a strong foundation for global awareness. Maria Montessori believed in presenting the universe to the child, allowing them to discover their place within it.
Early geography activities, like working with a continent box, help develop fine motor skills, spatial reasoning, and language. It's not just about memorising names; it's about understanding connections, celebrating diversity, and nurturing a sense of wonder. For Indian parents exploring Montessori at home India, this DIY project is a fantastic entry point.
Crafting Your DIY Montessori Continent Box: Materials & Method
The beauty of a DIY project is its flexibility and affordability. You don't need fancy materials; often, what you already have at home will do! This is particularly useful in an Indian context where resourcefulness is key.
What You’ll Need:
- A Sturdy Box or Tray: An old shoe box, a sturdy cardboard box from an online delivery, or even a thali tray with compartments works perfectly. You might need to add dividers if using a single large box.
- Coloured Paper/Fabric Scraps: Montessori uses specific colours for continents (Asia: Yellow, Africa: Green, Europe: Red, North America: Orange, South America: Pink, Australia: Brown, Antarctica: White). These colours provide a visual cue.
- Craft Supplies: Glue, scissors, sketch pens, clay (air-dry clay or even homemade playdough), sand, small stones, or even lentils for texture.
- Small Objects: Miniature animal figurines (local birds, elephants for Asia/Africa, kangaroos for Australia), pictures of landmarks, flags, or even small, distinct items representing each continent.
Step-by-Step Assembly:
- Prepare Your Base: If using a single box, divide it into 7 sections (one for each continent). You can use cardboard strips glued in place. For smaller apartments, you could even create separate, smaller boxes for each continent.
- Colour Each Compartment: Cut out the coloured paper or fabric in the shape of each continent and glue it into its respective compartment. This helps children visually associate the colour with the landmass.
- Add Textures (Optional but Recommended): For a truly sensorial experience, add different textures to each continent. For instance, a sprinkle of sand for Africa, some cotton for Antarctica, or smooth lentils for Asia.
- Gather & Place Objects: This is where the magic happens! For Asia, you might add a small toy tiger, a picture of the Taj Mahal, or a miniature Ganesh idol (if culturally appropriate for your family). For Europe, a tiny Eiffel Tower printout. For Australia, a toy kangaroo. These items serve as fascinating activity kits in themselves.
Playing & Learning with Your Continent Box
Once your DIY Montessori continent box is ready, the possibilities for learning are endless. Here are a few ideas:
- Continent Matching: Name a continent and ask your child to point to it. Later, introduce the Montessori Puzzle Map (or a printed version) and have them match the puzzle piece to the correct box.
- Object Sorting: Hand your child a basket of small objects and ask them to place each item in the continent where it belongs. This encourages critical thinking and classification.
- Storytelling & Exploration: Tell stories about children or animals from different continents. For instance, "Let's imagine a little boy in Africa who helps his family grow food..."
- Language Development: Introduce new vocabulary related to each continent – names of animals, cities, landmarks.
- Connecting to Indian Festivals: Discuss how festivals like Diwali are celebrated by Indian diaspora across different continents, highlighting cultural connections.
For parents looking for quality Montessori geography materials, SkilloToys.com offers a range of beautifully crafted items that complement these DIY efforts.
Key Takeaways
- A DIY Montessori continent box is an affordable and effective tool for early geography learning at home.
- It promotes sensorial learning, aligning with Maria Montessori's philosophy for children aged 0-6.
- Utilise common household items and local materials for creation, making it accessible for Indian homes.
- The box supports development of fine motor skills, language, and global awareness.
- Engage children through matching, sorting, storytelling, and connecting to cultural experiences.
FAQ: Your Questions Answered About DIY Continent Boxes
Q: What age is best for introducing the Montessori continent box?
A: Children typically start showing interest in geography around 2.5 to 3 years old. The continent box is ideal for children aged 3-6 years, as they are developmentally ready for concrete representations of the world.
Q: Do I need to use the exact Montessori colours for the continents?
A: While using the traditional Montessori colours (Asia: Yellow, Africa: Green, etc.) provides consistency if you later introduce other Montessori materials, it's not strictly necessary for a DIY box. The most important thing is that each continent has a distinct colour for visual differentiation.
Q: How can I make this activity engaging for a joint family with different age groups?
A: For younger children, focus on simple matching and naming. Older children or even grandparents can help gather objects, research facts about continents, or tell stories, making it a wonderful intergenerational learning experience. It's a great way to foster child development India style, with everyone involved.
Q: What if I don't have small figurines for each continent?
A: Don't worry! You can use printed pictures of animals, landmarks, or people. You can also get creative with drawings, cutouts from magazines, or even small, distinct items like a coin from a different country (if available) or a unique fabric scrap.
Creating a DIY Montessori continent box is more than just a craft project; it's an invitation to explore the world with your child, right from the comfort of your home. It’s an investment in their curiosity and a wonderful addition to your collection of educational toys for toddlers. Happy exploring!