DIY Knobless Cylinder Activity: Kitchen Roll Fun for Toddlers
In the vibrant, bustling heart of an Indian home, where every corner tells a story and every moment is a chance for discovery, finding engaging activities for our little ones can be a delightful quest. Especially for parents exploring Montessori at home in India, the idea of hands-on learning, often using everyday materials, truly resonates. Today, we're going to dive into a wonderful and super simple project: a DIY knobless cylinder activity made right from your kitchen rolls!
What is a Knobless Cylinder Activity?
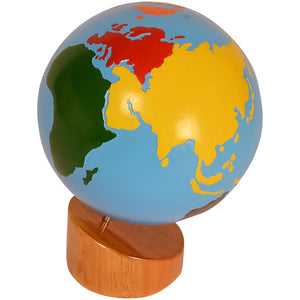
The knobless cylinder activity is a classic Montessori sensorial material designed to refine a child's visual discrimination of dimensions. In essence, it involves a set of cylinders that vary in height and diameter, which the child learns to sort and arrange by size. This works because children are naturally drawn to ordering and categorising their world, and this material offers a concrete way to develop their sense of visual order, preparing them for later mathematical concepts. Parents can offer this activity to help their child develop fine motor control, concentration, and problem-solving skills in a self-correcting way.
Why Montessori DIY is Perfect for Indian Homes
Many Indian families live in cozy apartments or joint family setups where space is a precious commodity. Creating your own Montessori learning activities means you don't need to dedicate a whole room to elaborate setups. It's about 'jugad' – ingenious improvisation – using what's readily available around you. Grandparents, often a central part of Indian households, can even join in the crafting fun, making it a beautiful intergenerational activity! For parents seeking Montessori learning materials that fit their lifestyle, DIY projects offer an accessible and sustainable path to rich child development in India.
Your DIY Knobless Cylinder Activity: Getting Started
Ready to turn those humble kitchen roll tubes into a treasure trove of learning? Let's gather our supplies!
Gathering Your Supplies (Desi Style!)
You'll be amazed at how easily you can find everything you need right at home:
- Empty kitchen paper towel rolls (aim for 4-5)
- A piece of sturdy cardboard (from an old delivery box works perfectly)
- Scissors (child-safe if your toddler wants to help, with supervision!)
- Pencil and ruler
- Glue (PVA glue or hot glue for quicker drying, used by adults)
- Optional: Paints, crayons, or markers for decorating
Step-by-Step Guide to Crafting Your Cylinders
- Cut Your Tubes: Take your kitchen roll tubes and cut them into varying heights. You want a range, perhaps from 2 cm to 8 cm. Aim for 8-10 cylinders in total, ensuring some are tall and thin, some short and wide, and everything in between.
- Create the Bases: Using your cardboard, trace circles slightly larger than the diameter of each cylinder. Cut these out. These will be the bases for your cylinders, giving them stability.
- Assemble: Glue each cardboard circle onto one end of a paper roll cylinder. Ensure it's secure so your cylinders stand upright.
- Decorate (Optional but Fun!): This is where the creativity comes in! You can paint each cylinder a different colour, draw patterns, or even label them with numbers if your child is older. Involve your child in this step if they enjoy it – it adds to their sense of ownership and excitement for the activity.
Presenting the Activity to Your Toddler
Once your DIY knobless cylinders are dry and ready, find a quiet space on a floor mat or a low table. Present them in a basket or tray. Gently demonstrate how to pick up each cylinder, observe its size, and try to fit it into an imaginary 'slot' on the mat, or simply line them up from tallest to shortest, or widest to thinnest. Remember, the Montessori approach encourages independent exploration. Allow your child, typically from 18 months to 3.5 years, to explore the cylinders at their own pace. There's no right or wrong way for them to start, just discovery!
The Learning Magic: What Your Child Gains
This seemingly simple activity is packed with developmental benefits, making it an excellent addition to your Montessori sensorial materials at home. Firstly, it sharpens visual discrimination – the ability to notice subtle differences in size. This is crucial for early literacy and numeracy. Secondly, picking up and manipulating the cylinders is fantastic for developing fine motor skills and hand-eye coordination. As they try to fit or arrange the cylinders, they engage in problem-solving and critical thinking. Most importantly, it fosters a deep sense of concentration, a key skill for any child development in India, laying the groundwork for more complex Montessori learning activities later on.
Tips for Success & Safety
Always supervise your child during play, especially with smaller parts if you decide to add any. Encourage child-led play – let them explore without interference, but be ready to assist if they get frustrated. Remember, the goal is not perfection, but the process of learning. If you have older children or even your Dadi or Nani around, involve them! They can help prepare the materials or even observe the younger one's joyful exploration, fostering a beautiful connection. Rotate activities regularly to keep your child's interest piqued, bringing this out every few days.
Key Takeaways
- A DIY knobless cylinder activity refines a toddler's visual discrimination and fine motor skills.
- It's an accessible and cost-effective Montessori activity perfect for Indian homes.
- Materials are easily found: kitchen paper towel rolls, cardboard, glue, and scissors.
- The activity encourages concentration, problem-solving, and hand-eye coordination.
- Parental guidance, child-led exploration, and regular rotation enhance its effectiveness.
FAQ
What is the ideal age for the knobless cylinder activity?
Typically, children between 18 months and 3.5 years benefit most from the knobless cylinder activity. However, individual development varies, so observe your child's interest and ability to engage with the materials.
How is a DIY knobless cylinder activity different from the original Montessori material?
The original Montessori knobless cylinders are precisely crafted wooden sets that offer specific variations in height and diameter across four distinct boxes. A DIY version, while not as precise, still offers the fundamental benefits of size discrimination and fine motor development using readily available, cost-effective materials.
What other household items can I use for similar Montessori activities?
You can use items like clothes pegs for practical life skills, various sized containers for pouring and transferring, or even lentils and spoons for scooping activities. The key is to adapt everyday objects into purposeful learning tools that promote independence and skill development.
How often should I offer this activity to my child?
Montessori principles suggest offering activities when your child shows interest. You can keep the DIY knobless cylinders available in their play area and observe if they gravitate towards it. Rotating activities every few days or weeks keeps their engagement fresh and prevents boredom.
Is this activity safe for my toddler?
Yes, when made with safe, non-toxic materials and under adult supervision, this DIY activity is safe. Ensure the cylinders are large enough not to be a choking hazard and any decorative elements are securely attached.
Embracing Montessori at home doesn't require a special classroom; it begins with a mindset of respect for the child and a little creativity. We hope this DIY knobless cylinder activity brings joy and learning to your little one. Explore more enriching educational toys for toddlers and authentic Montessori resources at SkilloToys.com!