DIY Sandpaper Letters: Make Your Own at Home for Preschoolers
Namaste, wonderful parents! There's a special kind of joy in watching our little ones explore and discover the world around them, isn't there? In our bustling Indian homes, finding engaging and educational activities for preschoolers that fit seamlessly into daily life can sometimes feel like a quest. Today, we're diving into a beloved Montessori classic: sandpaper letters, and how you can easily make your own right at home!
Many of you, like us, are passionate about fostering independent learning and a love for knowledge in your children. Montessori principles, with their emphasis on hands-on exploration, are perfect for this. Creating your own Montessori materials, like these tactile letter cards, is not only economical but also deeply rewarding, connecting you further with your child's learning journey.
What Exactly Are Montessori Sandpaper Letters?
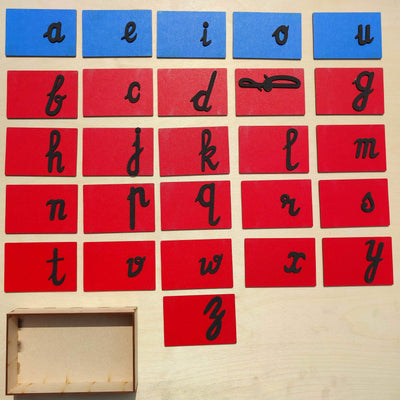
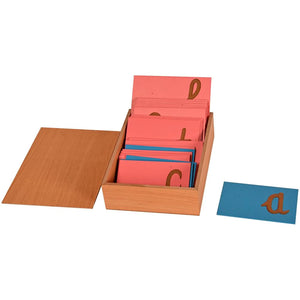
Montessori Sandpaper Letters are a foundational language material designed by Dr. Maria Montessori to introduce children to the shapes and sounds of letters through a multi-sensory approach. Each letter, typically a lowercase consonant or vowel, is crafted from a rough texture (like sandpaper) and mounted onto a smooth card. The child traces the letter with their fingers, feeling its form, while simultaneously hearing its sound, thus engaging their tactile, visual, and auditory senses. This unique method makes learning letters an intuitive and deeply ingrained experience, preparing children for reading and writing.
Montessori Sandpaper Letters are a tactile way to introduce letter shapes and sounds. This works because children learn best through their senses, and the direct experience of feeling the letter form helps cement its recognition in their minds. Parents can offer these to help their child associate sound with form, building a strong foundation for literacy.
Why Sandpaper Letters Are a Montessori Must-Have for Early Literacy
In the Montessori philosophy, learning isn't just about memorising; it's about experiencing. Sandpaper letters are an excellent example of this. They prepare a child's hand for writing by developing muscle memory for letter formation long before they pick up a pencil. They also enhance phonetic awareness, which is crucial for early reading.
For children aged 3-6, a period of immense language absorption and child development, these letters are invaluable. They move beyond rote learning, making the abstract concept of letters tangible and exciting. Whether you live in a bustling joint family or a cozy apartment in Bengaluru, these simple cards can transform a corner of your home into a vibrant learning space, contributing to holistic Montessori learning activities.
Gathering Your Materials: A Desi Touch for Your DIY Project
One of the beauties of DIY Montessori is that you often don't need fancy, expensive supplies. A quick trip to your local stationery shop (or even raiding your 'kachra-patti' box for recyclables!) is usually enough. Here's what you'll need:
- Cardboard or Chart Paper: Sturdy cardstock, old cereal boxes, or thick chart paper from a 'nukkad dukan' works perfectly.
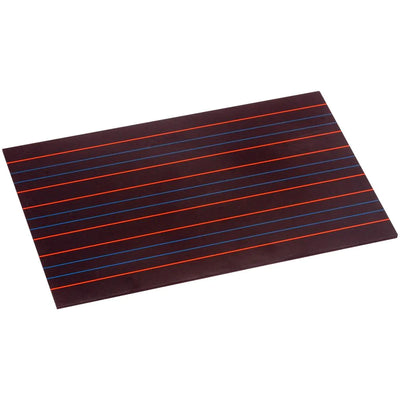
- Fine-Grit Sandpaper: Look for fine-grit sandpaper at a hardware store. A single sheet is usually enough.
- Strong Adhesive: Fevicol or any strong craft glue.
- Scissors: For cutting cardboard and sandpaper.
- Pencil and Ruler: For precise measurements.
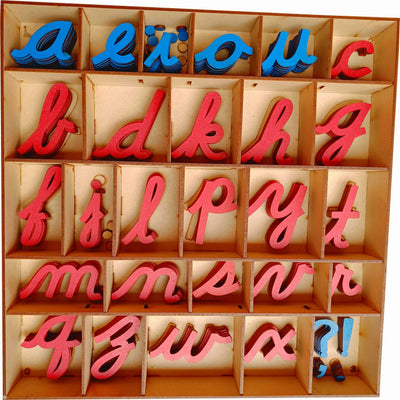
- Marker Pens: Red for vowels and blue for consonants (traditional Montessori colour coding).
Step-by-Step Guide to Crafting Your Own Sandpaper Letters
Preparing Your Bases
Start by cutting your cardboard or chart paper into uniform rectangular cards. A good size is about 4x5 inches (approx. 10x12.5 cm), large enough for comfortable tracing. You'll need 26 cards for the alphabet, plus any additional local language letters if you wish to introduce them later.
Creating the Tactile Letters
- Draw the Letters: On the back (smooth side) of your sandpaper, carefully draw the lowercase letters of the alphabet. Remember, Montessori focuses on lowercase first as most of what children read is in lowercase. Ensure the letters are large enough to be traced comfortably with two fingers.
- Cut Them Out: Carefully cut out each sandpaper letter. Take your time to get the curves and lines right.
- Glue to Cards: Apply a generous amount of glue to the back of each sandpaper letter and firmly press it onto the center of your smooth cardboard card. Make sure the sandpaper side is facing up. Allow them to dry completely.
The Finishing Touches
Once dry, use your marker pens to draw a border around each letter. Traditionally, vowels (a, e, i, o, u) are outlined in red, and consonants are outlined in blue. This colour coding provides an additional visual cue for the child. While making your own is wonderful, for those looking for ready-made, high-quality options, explore our Sandpaper Letters collection or other Montessori language materials.
Presenting Sandpaper Letters the Montessori Way
Introducing these letters is an art, not a chore. The classic Montessori approach involves a 'Three-Period Lesson':
- First Period (Naming): Say, "This is 'm'" while tracing the letter with two fingers. Have your child trace it too. Repeat with two more letters (e.g., 's', 'a').
- Second Period (Recognition): "Show me 'm'." Mix the three letters and ask your child to identify them.
- Third Period (Recall): "What is this?" Point to a letter and let your child say its sound.
Keep these sessions short, sweet, and always follow your child's interest. Perhaps a grandparent can join in, sharing stories while introducing a new letter, making it a truly intergenerational Montessori at home India experience.
Integrating Sandpaper Letters into Your Home Environment
These homemade educational toys for toddlers can be incorporated into daily life beautifully. Place them in a small basket or tray in a quiet corner – perhaps near the puja ghar, or a sunny window – making them easily accessible. During festivals like Diwali, you could pick out letters to spell related words. If your child loves to help in the kitchen, use letters to identify spices! The possibilities are endless, fostering early literacy and a love for learning organically.
Key Takeaways for Your DIY Sandpaper Letters Journey
- Montessori Sandpaper Letters are crucial for multi-sensory letter learning.
- DIY versions are cost-effective and allow for personalized touches using local materials.
- Essential materials include cardboard, fine-grit sandpaper, glue, and markers.
- Follow a precise step-by-step guide for crafting the letters.
- Introduce letters using the Montessori Three-Period Lesson for optimal engagement.
- Integrate these letters naturally into your Indian home environment and daily routines.
- This activity significantly contributes to a child's early literacy and overall child development.
Frequently Asked Questions About DIY Sandpaper Letters
What age is suitable for introducing sandpaper letters?
Children typically show readiness for sandpaper letters between 2.5 to 3.5 years of age. Look for signs like an interest in sounds, pointing to letters, or an emerging desire to trace. It's always about following the child's individual pace and interest.
Can I use different colours for vowels and consonants than red and blue?
While red for vowels and blue for consonants is traditional in Montessori, you can certainly adapt the colours. The key is consistency – choose a system and stick with it so your child can easily distinguish between them visually without confusion.
How often should we use sandpaper letters with our child?
Short, focused sessions (5-10 minutes) are often most effective, ideally daily or a few times a week. The goal is to keep it enjoyable and not forced, letting your child lead the interaction and showing sustained interest.
What if my child isn't interested in the sandpaper letters?
If your child isn't interested, put the letters away and reintroduce them another day. Perhaps observe what currently captures their attention and try to link it. Remember, pressure can create resistance, so keep it light and fun.
Creating your own sandpaper letters is a wonderful way to bring a piece of the Montessori magic into your Indian home. It's a journey of discovery for both you and your child, fostering a deep love for learning. For more resources and beautifully crafted materials that support your child's development, explore the collections at SkilloToys.com.